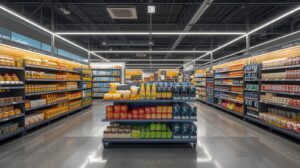
Why Secure Your Gondola Shelving?
Gondola shelving is the backbone of many retail environments. It carries everything from heavy packaged goods to fragile merchandise, often stacked high to maximise display space. While these systems are designed with stability in mind, they are not immune to tipping or shifting. A fully stocked bay can exert enormous pressure on uprights and bases, especially when customers lean on the shelves or when products are restocked in bulk.
Securing gondola shelving to walls or floors is not only a matter of compliance in some regions, it’s also a matter of common sense. An unsecured unit risks collapsing, damaging stock, injuring staff, and undermining customer confidence.
At Mills Shelving, we often remind retailers that anchoring is less about the act of bolting down and more about the peace of mind it brings. A well-secured shelving system is one that performs consistently, day after day, without becoming a hazard on the shop floor.
Before any drilling or bolting begins, it’s important to establish whether your shelving needs to be secured. Not every installation requires anchoring, but many do.
A widely recognised guideline in the industry is the height-to-depth ratio. If the shelving unit is more than six times taller than it is deep, anchoring is considered necessary. To illustrate, a gondola unit that is 2100mm high with a base depth of 300mm would exceed the safe ratio, making it prone to tipping under load.
Another factor is location. In seismic zones, regulations often require gondola shelving to be anchored either to the wall, the floor, or both. Local building codes may specify exact methods or materials, and these take precedence over general installation advice. Even outside seismic areas, high-traffic stores benefit from anchoring because of the constant movement and handling of stock. Unit type matters too—compare one-sided wall bays vs double-sided aisle runs when planning stability and anchoring points.
The type of merchandise also plays a role. Heavy items stored on upper shelves create a top-heavy effect that can destabilise the unit. In such cases, anchoring becomes less of an option and more of a necessity. Large retailers routinely conduct risk assessments to determine the stability of shelving under different loads, but smaller operators should apply the same principle. If a bay looks unstable when empty, it will not improve once it’s full.
Assessing the site also involves checking the surface. Is the floor level? Is the wall made of concrete, timber studs, or plasterboard? The material will determine what type of anchors and fixings are suitable. Skipping this assessment often leads to poorly secured shelving, which is almost as risky as leaving it unsecured.
Once the need for anchoring is confirmed, preparation is the next priority. Securing gondola shelving requires standard tools, but the correct hardware is equally important.
Tools commonly required:
Anchoring materials include:
The exact specification of these fixings will depend on your environment. For example, anchoring into concrete requires different bolts to anchoring into timber or masonry. Retailers often underestimate this stage, only to discover later that the hardware is incompatible with their surfaces. A well-prepared installation always begins with the right kit on hand.
Before assembling the shelving itself, time spent on layout will save considerable effort later. Gondola shelving is most stable when aligned precisely and supported evenly across its run.
Start with the floor. Using a chalkline, snap a straight reference line where the run will sit. This provides a guide to keep the base shoes aligned and prevents drift as the installation progresses. A slight misalignment at the start often compounds into larger issues when multiple bays are connected together.
Once the chalkline is in place, position the uprights and base brackets according to the planned layout (see gondola components—uprights, base shoes and brackets for clarity). At this stage, avoid tightening or anchoring anything permanently. The aim is to get a clear view of how the run will sit within the store.
Temporarily adding two shelves across the first section helps to keep uprights square while the rest of the run is built. This also provides a visual reference for levelling and ensures the shelving isn’t leaning forward or backward before anchoring.
For longer runs, it’s worth stepping back and checking alignment from different angles. Even small inconsistencies are easier to correct now than once the units are fully stocked.
With the bases positioned, attention shifts to assembly and levelling. Gondola shelving uprights must be perfectly plumb, both front-to-back and side-to-side, to ensure stability.
Begin by locking the base brackets securely into the uprights. Check that latch tabs or locking mechanisms are engaged, as loose shop fittings compromise the entire structure. Once the frame is upright, measure against the chalkline to confirm correct positioning.
Levelling legs come into play next. Floors in retail spaces are rarely flawless, and even small dips can create instability. Adjust the levelling legs on each upright until the shelving stands true. The spirit level should read correctly in all directions.
In some cases, especially when installing wall units, it’s recommended to tilt the uprights slightly backward—by about 15 to 20mm over a 2-metre height (roughly three-quarters of an inch). This subtle adjustment helps counterbalance the forward pull created by merchandise placed on upper shelves. It also ensures that any accidental pressure from customers leaning on the display doesn’t push the unit off balance.
From our own installations, we’ve noticed that even small adjustments at this stage have a big impact once the shelves are fully stocked. Units that appear steady while empty can shift under load if not properly aligned, and correcting those issues later is far more disruptive. Taking the time to get the uprights plumb and secure from the start prevents problems that retailers often only discover after their first delivery.
Once the uprights are plumb and stable, recheck alignment across the entire run. Shelving units are designed to distribute load evenly, so one uneven upright can affect multiple bays. Patience at this stage is rewarded with a strong, straight installation that makes anchoring far more effective.
Once the shelving frame is assembled, the most important stage begins—anchoring. Without it, even the straightest and most carefully levelled unit can become a hazard. The method you use depends on whether you’re securing to the wall, the floor, or both.
A. Wall Anchoring
Wall anchoring involves attaching the shelving uprights to a solid wall surface. This provides stability and prevents forward tipping.
Key considerations for wall anchoring:
B. Floor Anchoring
Floor anchoring secures the base shoes of the shelving run directly into the floor. It’s often required for free-standing gondolas and long runs.
Practical guidelines:
For maximum stability, many retailers use both methods. Wall anchoring handles forward tipping, while floor anchoring stabilises the entire run.
Anchoring does not end when the last bolt is tightened. A thorough inspection is required before stocking begins.
| Check | What to Look For | Corrective Action |
| Upright alignment | Leaning forwards or sideways | Adjust levelling legs; retighten anchors |
| Bolt tightness | Loose bolts or uneven tension | Tighten all fixings with a torque wrench if available |
| Shelf level | Visible slope across bays | Reset shelf brackets; recheck plumb |
| Run continuity | Gaps or misalignment between bays | Adjust connections before stocking |
| Stability under pressure | Does the unit rock or shift when pushed? | Add additional anchors or re-drill if necessary |
Load testing should always follow. Add a modest amount of weight to the upper shelves first, then gradually stock lower shelves—refer to safe load limits for gondola shelves before fully stocking.
Securing shelving isn’t a one-off job. Over time, fixtures experience wear, bolts may loosen, and floor surfaces may shift slightly. A regular maintenance schedule keeps the installation safe.
Retailers with heavy traffic or constantly changing product ranges should be especially vigilant. A bay that felt secure during installation may need reinforcement once merchandise changes from light items to heavy stock. Treat anchoring as part of store safety, not just installation.
For clarity, here are some of the most frequent errors we’ve seen retailers make when securing gondola shelving—plus more common retail shelving mistakes worth reviewing:
Avoiding these mistakes saves both time and risk in the long run.
Securing gondola shelving to walls or floors is more than a technical task—it’s a safeguard for your store, your staff, and your customers. The process involves planning, preparation, careful installation, and ongoing vigilance. Anchoring properly ensures stability, compliance with regulations, and a smooth retail operation without the risk of collapse or injury.
At Mills Shelving, we’ve seen the difference between anchored and unanchored installations countless times. The anchored runs not only perform better but also stand the test of time with fewer adjustments needed. If your shop shelving looks unsteady or you’re planning a new fit-out, following the steps outlined here will help you achieve a safer, more reliable installation.